Preview Images in terminal with iTerm2, Tmux, and VIFM
Search for a command to run...
No comments yet. Be the first to comment.
Introduction Removing the background from a PDF file can be a tricky task, especially for Mac users. However, with a combination of Preview, iLovePDF, and Microsoft PowerPoint or Keynote, you can achieve a clean PDF without the background. In this bl...
A beginner's guide to understanding Haskell's type system

Handle Errors in Functional Way
VIM 中让人眼花缭乱的跳转方式

In this blog, we will explore how to preview images directly in the terminal using iTerm2, tmux, and vifm. This capability can significantly enhance your workflow, especially if you are a developer, system administrator, or a terminal enthusiast.
Previewing images in a terminal might seem unusual, but it's a feature that can greatly streamline your workflow. Whether you're managing files, tweaking your system, or developing, being able to view images without leaving the terminal is a handy skill. We'll go through several methods and tools, including catimg, imgcat, and how to integrate image preview in vifm and tmux.
catimg is a simple and effective program for showing images in the terminal. It changes images into an ASCII-like format, allowing them to be seen as colored text in the command line. This makes it widely compatible with most color-supporting terminals and offers an easy solution for terminal image previews. However, catimg has limitations in detail, as it shows images in a pixelated, ASCII-art style, losing finer details. This makes it great for a quick view of an image's overall appearance but not for detailed viewing. In short, catimg is ideal for fast, basic previews in the terminal, but for more detailed images, other tools might be better suited.
Installation: use Homebrew: brew install catimg.
Usage: Simply type catimg path_to_image. The image will be displayed in an ASCII-art style in your terminal.

Unlike catimg, imgcat is capable of rendering images in the terminal with full detail, akin to what you would expect from GUI applications. There are two distinct versions of imgcat: one is a standalone binary package, and the other is a script specifically for iTerm2, which is tmux-compatible. Here are the details for each:
The standalone version of imgcat can be easily installed on systems like macOS using Homebrew. It's a robust choice for direct terminal usage but does have limitations when used within tmux.
Installation: Install it using Homebrew with the command: brew install imgcat.
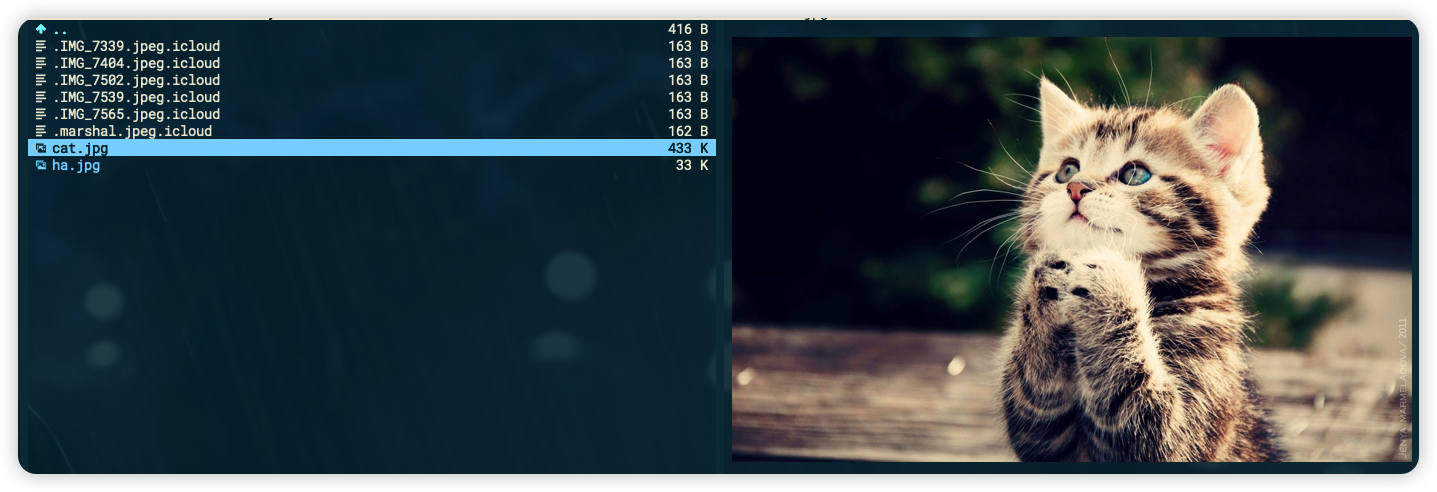
Usage: To use imgcat, simply run the command followed by the image file and optional parameters, such as height. For example: imgcat --height 20 cat.jpg.
Limitation: The primary drawback of this standalone imgcat is its incompatibility with tmux. This limitation arises because tmux, as a terminal multiplexer, handles terminal sessions and display outputs differently, which interferes with the way imgcat renders images.

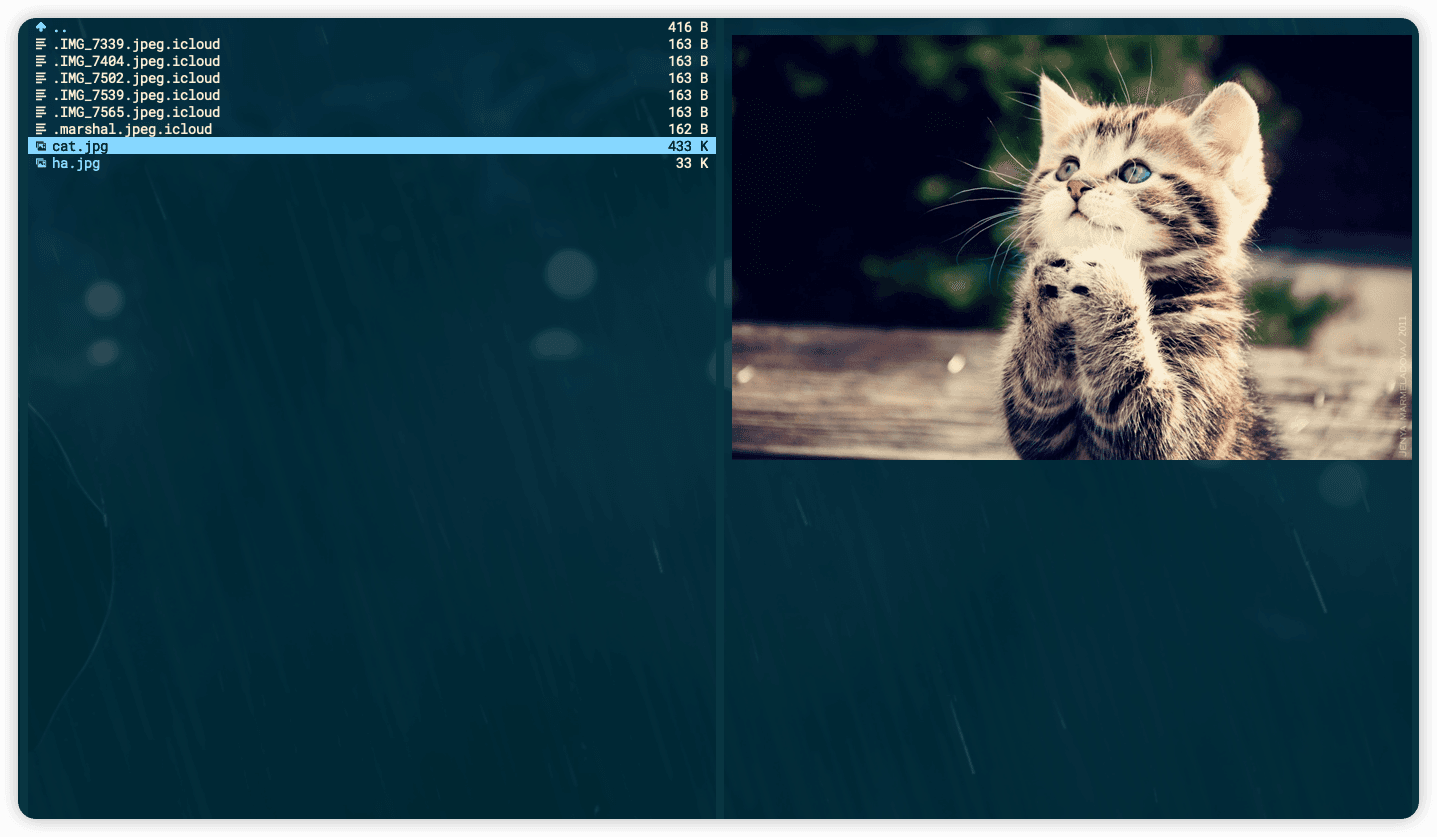
The iTerm2 version of imgcat is a script that enhances iTerm2’s capabilities, enabling full-color image display within the terminal. This version is particularly noteworthy for its compatibility with tmux, making it a versatile option for users who frequently work within tmux sessions.
Installation: This script is generally included with iTerm2 or can be downloaded from iTerm2's resources or GitHub repositories. Link
Usage: To display an image, run the script with the image file as an argument. It works seamlessly within iTerm2, even when using tmux.
Tmux Compatibility: The iTerm2 imgcat script leverages iTerm2's advanced image handling capabilities, which allows it to function properly even in a tmux environment.
Enable Passthrough in Tmux (3.3a and newer): Add
set-option -g allow-passthrough onto your.tmux.confto allow theimgcatscript to send image rendering sequences in tmux.Set Correct TERM Variable: Ensure your
TERMvariable in tmux is set toscreen-*ortmux-*for theimgcatscript to function correctly.
VIFM, a console file manager, can be configured to use imgcat for image previews, offering a rich visual experience in the terminal. Here's a guide to setting it up:
NOTES:
You need to control the cursor with tput to make it render at the correct position, also need to use
%Nto make the tty works in vifm.Again, to make it work well in tmux, you need to use the script from iterm2.
Edit vifmrc:
vifmrc file to associate image file types with imgcat: fileviewer *.png,*.jpg,*.jpeg,*.gif
\ tput cup %py %px > /dev/tty && imgcat %c:p > /dev/tty %N